


Choose location
Choose location
Global
-
-
North and Central America
Can't find your location? Visit our global site in English.
-
South America
Can't find your location? Visit our global site in English.
- Asia
-
Oceania
Can't find your location? Visit our global site in English.
-
Europe
- Austria - Deutsch
- Belgium - English Français
- Czech Republic - Česky
- Finland - Suomalainen
- France - Français
- Germany - Deutsch
- Italy - Italiano
- Kazakhstan - Русский
- Netherlands - Nederlands
- Poland - Polski
- Portugal - Português
- Romania - Română
- Spain - Español
- Switzerland - Deutsch Français Italiano
- Sweden - Svenska
- Turkey - Türkçe
- United Kingdom - English
- Africa and Middle East

Resources


Self service


Contact support


Staying with the customer all the way
If you encounter any problem with your Axis product, or just have a question, don't hesitate to contact Axis' support. With online support services and engineers around the globe, we are here to help. Axis can assist you - wherever you are, whenever you need it.
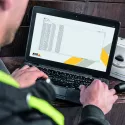
How to register a support case, step-by-step
First time creating a support case? This short video gives you a step-by-step guide on how to create a support case.
Have a question? Ask everyone.

Developer community
Browse answers, ask questions and get solutions from other Axis Communications customers.
Help to set the IP address for your network video product
Help to set the IP address for your network video product
Canon support
Axis supports Canon network cameras in EMEA, USA, Canada, Australia and New Zealand.
Your partner in protection
A secure environment requires active participation from everyone in the organization as well as the entire vendor supply chain. At Axis, we focus on the principles of secure by design and aim to deliver products and services that our customers can trust to install in their environment. We also provide documentation, training, and tools to help you keep your Axis products and services up-to-date and protected.